Sunday, October 25, 2009

Weekly Round-Up - October 25, 2009

Oh I know that I haven't posted a dish since the farfalle last month. I do honestly have things planned (homemade pasta!) but have been busy this week with Cooking From 1,000 Vegan Recipes. I figure that if I'm slacking here, I may as well link to my entries once a week.

Okay here's the weekly round-up:

Really though, I do have non-cookbook stuff planned. Have a great Sunday!

Saturday, October 17, 2009

New Project!

I just started a new group blog with five other awesome vegans. It's called Cooking From 1,000 Vegan Recipes and we're basically going to cook and blog about recipes in Robin Robertson's latest book, 1,000 Vegan Recipes. It's a HUGE book that I think every vegan should get since it spans so many different cuisines and is chock full of information.

I thought about cross-posting entries here but I think that's a little repetitive. I'll still be cooking other stuff which will of course be posted here. Speaking of which, I just bought a pasta maker/roller thingy so expect some pasta posts in the next few days.

So check out the new blog!

Cooking From 1,000 Vegan Recipes

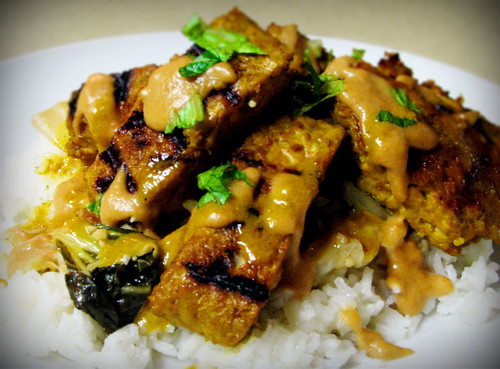
Okay here's a teaser of the first thing I cooked from the book. Tempeh Satay. Go read about it!

Tempeh Satay

Saturday, September 19, 2009

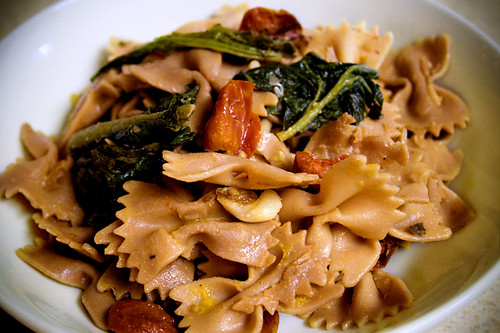
Farfalle with Roasted Rapini, Tomatoes and Garlic

Farfalle with Roasted Rapini, Tomatoes & Garlic

A seemingly simple dish of farfalle tossed with margarine, salt & pepper and roasted rapini, cherry tomatoes and garlic. The vegetables were tossed with olive oil, salt & pepper and then oven roasted at 450F for about 25 mins.

Although it appears super simple, this dish was a little more complicated with subtle extras in the flavour profile.

I utilised two methods that I read about recently on the blog Ideas in Food (warning, blog is not vegan): roasting dry pasta and rehydrating the pasta in cold flavoured liquid prior to cooking. After I read these, I was intrigued and had to try it myself.

The idea behind the roasting is to give the plain pasta more flavour -- a subtle hint of roasty goodness. I don't know why this isn't more popular. After all, we pan toast Israeli couscous before using it and it's technically pasta.

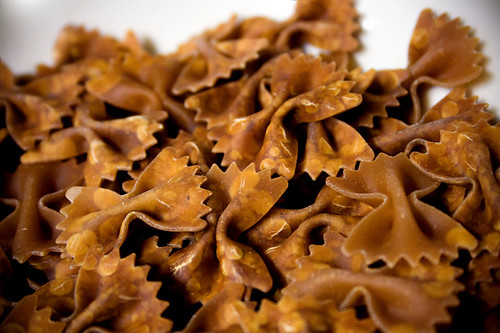
Here I've roasted plain farfalle (not whole wheat) in the oven for about 15 minutes at 350F. I checked it every 5 mins and tossed it around for roasting. I probably could have roasted for 20 minutes but didn't want to burn it because once it starts roasting, it gets roasted pretty fast. Keep reading!

Roasted Farfalle

I let the pasta cool for a few minutes and prepared a simple hydrating liquid. I took a can of quality whole tomatoes, mashed it up a bit and strained the juice. I added salt and enough cold water for the amount of pasta needed. The idea behind hydrating is to enable someone to cook the pasta much faster later (soaked pasta only takes a few minutes to cook) which would be great for a restaurant or even a home pasta party. I was less interested in the cooking method and more interested in the flavour infusion. The neat thing is that with cold water, the pasta does not stick since the starches aren't released until heat is added.

Anyway, I let the pasta soak in the cold liquid for about 1.5 hours. This is how it looked like after soaking. Keep reading!

Soaked Farfalle

I drained the pasta and cooked it in boiling water for about 3 minutes. Then tossed it with margarine, salt, pepper and my roasted vegetables.

The verdict? I could taste the roasted flavours as well as tomato infused in the pasta but it was very subtle. At first I was a bit disappointed because I guess I expected more flavour. HOWEVER, the more I ate, the better it tasted and the more addictive it became.

Even though there are a few extra steps and this takes some planning, I will definitely do the roast & soak pasta methods again and play around more with deeper roasting and other soaking liquids.

Sunday, September 13, 2009

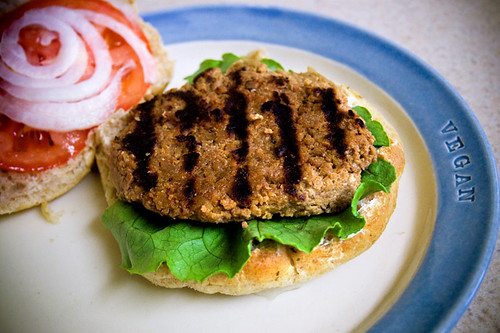
Vegan Burgers... That Don't Fall Apart!

Vegan Burger

There are two types of vegan burgers. The healthy beans/grains/seeds/vegetable kind and then there's the junkie solid patty kind. I prefer the latter.

Most vegans, regardless of burger preference, are always on the hunt for a burger recipe that doesn't fall apart and holds up to the grill or a pan. Some time ago I stopped buying store-bought burgers and buns (and bread) because of the cost, ingredients and taste. I've tried several burger recipes, but this one so far is the best (recipe for patties and buns follows). Here's a cross-section so you can see how compact the patty is -- almost like the commercial brands.
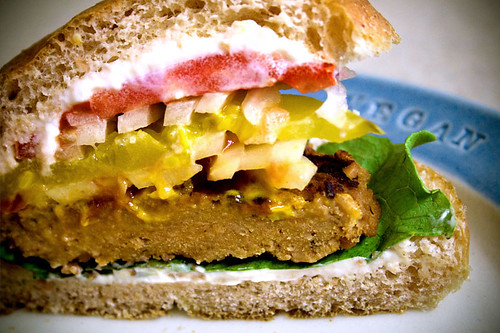
Vegan Burger

The recipe is not mine. I found it on this blog but it is credited to Bryanna Clark Grogan with, I assume, permission to repost (if I'm mistaken, please let me know) . So I am reposting with my own directions and commentary to (hopefully) make it easier to follow, with the credit to this blog and Bryanna Clark Grogan. It is a good base recipe and provides lots of room to customise to your tastes.

If you are going to make this, go ahead and double it and make 8 decent-sized patties. You can freeze them for later use. Also, it is a good idea to make these a day before you want to grill them. Because they need to cool completely before frying or grilling, it is a bit of a hassle to make the same day and then play the waiting game. If you are sensitive to sodium, cut the soy sauce in the cooking liquid. It really seems to permeate the outside of the patties.

Vegan Burger Patties

(Original recipe found here with credit to Bryanna Clark Grogan)

Dry Mix

2/3 cup vital wheat gluten
1/3 cup soy or chickpea flour (I used chickpea flour)
4 tbsp oatmeal / rolled oats
1 tsp dry marjoram
1 tsp onion powder

Wet Mix

2 tbsp soy sauce (I used Japanese soy sauce)
2 tbsp ketchup
1 tbsp sesame seed oil (optional, I used dark toasted sesame oil)
cold water (enough to make 7/8 cup mixed with the soy sauce, sesame oil & ketchup)
1/2 cup dry TVP crumbles rehydrated in 1/3 cup boiling water and then cooled completely

Cooking Broth

1 cup hot water
3 tbsp soy sauce (cut back a bit if you are sensitive to sodium)
1/2 tbsp sesame seed oil (optional)
2 cloves garlic, crushed or minced
  1. Preheat the oven to 325F.

  2. Mix the dry mix ingredients in a large bowl and set aside.

  3. Mix the wet mix ingredients in a separate bowl. Before you mix with the dry ingredients, make sure everything in your wet mix is cold or room temperature, especially the rehydrated TVP. If it is not cold or room temperature, then your final dough/mix will be stringy and unappealing.

  4. Mix the wet mix into the dry mix and knead for a few minutes until the mixture starts to firm up. The more you knead, the firmer it will get since you are developing the gluten. The firmer the dough is, the less likely it will fall apart during cooking.

  5. Form the dough into 4 equal sized patties and put them in an oiled baking dish that is big enough for them to remain one layer and high enough to accommodate the cooking liquid. If you have doubled the recipe, a little overlap is okay. I was able to fit 8 patties with a slight overlap in an extra larger glass lasagna pan.

  6. Mix the cooking liquid ingredients and pour over the patties in the baking dish. Cover the dish with foil and bake for 15-20 minutes. Take them out and flip the patties (be gentle because they are really delicate when half cooked), re-cover with foil and bake for an additional 15-20 minutes. The cooked patties out of the oven should feel a bit firm in the middle but kind of sludgey on the outside because of the cooking liquid. If they still feel a bit doughy and gummy in the middle, throw it back in the oven for another 5 to 10 minutes. Even though they are firmer than when they were raw, they are still pretty delicate until they've gone through the cooling stage.

  7. Set the patties on a plate or pan and COOL COMPLETELY in the refrigerator until cold, preferably overnight. They will be super firm when they are cold.

  8. FINALLY, take your cold patties and fry them or oil them slightly and grill them.
Whew. That was a lot of steps, eh? Trust me, if you're into burger patties like Yves or Boca, this recipe is worth the trouble.

Oh right, I also promised you a bun recipe. The recipe I use for buns is my own combination of a bread recipe in this book and this bun recipe. I'll save my combo recipe for another day. For now, use the bun recipe and split the dough into 8 pieces for 8 buns.

Enjoy!

Tuesday, September 1, 2009

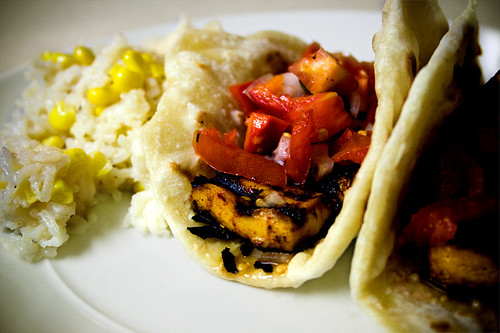
Grilled and Marinated Tofu Tacos

Tofu Tacos

Marinated and grilled tofu on top of homemade flour tortillas and topped with pico de gallo and a side of rice and corn. I know that corn tortillas are more authentic but I have a hell of a time working with masa harina.

The tofu was from my previous post and was marinated in a chipotle adobo citrus marinade and then grilled. The marinade was inspired by the Mexican Smoked Chile Marinade on Recipezaar with very minor changes. I used chipotles in adobo sauce (the recipe doesn't state in adobo but I assumed it was and also used about 8 chiles or so), no orange zest, and added in a few tablespoons of agave nectar for some extra sweetness because I was too impatient to reduce the citrus juices.

The tortillas were basically just 2 cups (white) flour mixed with some salt and 3/4 cup boiling water, kneaded and then formed into a ball and covered with plastic wrap for 30 minutes. Then it was split into 6 portions, rolled or pressed thin and then fried in a dry pan on medium until both sides are cooked and have some brown spots. This only takes a minute or so, depending on how hot your pan is. I didn't bother putting in any oil since we were eating them all in one sitting and not storing any. If you want a softer tortilla and will make extra for the next day, then definitely put in a little oil or vegetable shortening (1 to 2 tbsps should do the trick). Anyway, this wheat flour dough is a really basic dough that can be used for several different things like scallion pancakes, dumpling wrappers or even wheat noodles. Super easy, inexpensive and made with ingredients that pretty much everyone has on hand.

The pico de gallo is something I've been making regularly for the past month to take advantage of all the lovely CSA summer produce. It's just diced onion, tomatoes, red pepper, jalapenos, lime juice, salt, pepper and a sprinkle of sugar. I would have put in cilantro but the boy doesn't really like it and we didn't have any on hand. Also, I generally go light on the jalapenos so that the heat doesn't overpower the sweetness of the other ingredients. So lovely and fresh that I sometimes just eat it straight out of a bowl like a salad.

This meal really tasted like summer. Such a shame that it's already September! Oh well, what can you do?

Lastly, here's a bonus photo of Smuckers. :)

Smuckers

TofuXpress!

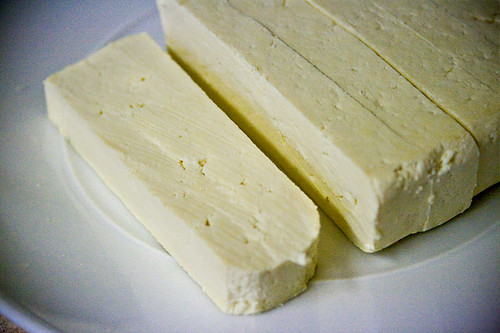
Pressed Tofu

Look that lovely tofu. Nicely pressed and compacted with help from the TofuXpress. The result is firm and creamy without all that excess liquid.

I never really thought I would ever buy a tofu press since I really never pressed tofu when I would use it. I would just slice and drain and maybe squeeze out a little liquid and that's it. Then I spotted this post recently by everyone's favourite (and super hip) vegan grandmother, Bryanna Clark Grogan. Bryanna sang her praises for the TofuXpress and I knew I had to have one. It may seem a little pricey but if you eat a lot of tofu, it's worth it. You can't tell by the photos but the unit is well made and very sturdy.

I bought it on the website and a few days later it arrived. Here's a few photos.

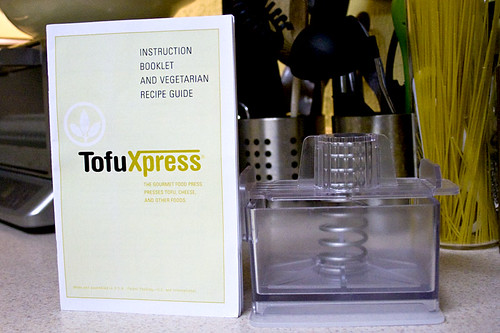
Fresh out of the box.

TofuXpress


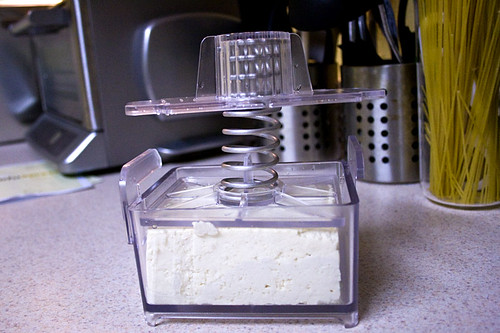
With 1 package of Nasoya extra firm tofu. If you've had that brand, you know it's really not that firm.

TofuXpress


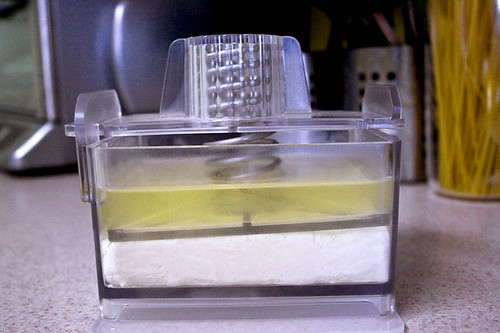
After a few hours of pressing. Look at all the liquid!

TofuXpress


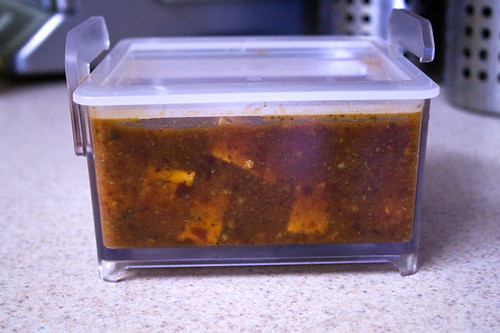
Sliced and then sitting in marinade (see my next post). The container comes with a lid that you can slap on when you marinate or store in the fridge.

TofuXpress


Anyway, it's a fantastic gadget that is well worth the money and is also very compact to store. If you're looking for a tofu press, this one definitely delivers. I can definitely see myself using it for pressing different things like TVP chunks, soy curls or pieces of seitan. If you're tired of pressing tofu the old fashioned way with plates and weights or paper towels or tea towels, do yourself a favour and get one of these!

For the record, I was not asked to review this nor did I get this for free. I bought and paid for it -- I'm just a happy customer. :)

Monday, August 31, 2009

Pizza!

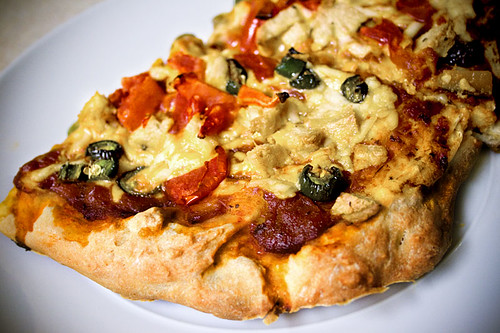
Pizza

Sometimes you just don't feel like thinking about cooking and sometimes you need to clean out the fridge. Yesterday was a bit of both.

I had some sauce leftover, 1/2 a package of Cheezly. jalapenos and tomatoes that were super ripe and a few pieces of seitan. So, what better way to use it than to make pizza?

The pizza dough recipe is the No Rise Crust recipe from Recipezaar. I prefer a wetter dough so I cut back on the flour a little bit. Sure, it doesn't have a developed taste like long rising/fermenting doughs but it is quick, easy and pretty good.

So there you have it, a clean-out-the-fridge Sunday dinner. Fast, easy, tasty and so much cheaper (and tastier) than delivery.

Macaroni in a Cashew / Almond "Cheese" Sauce

Macaroni & Beet Greens

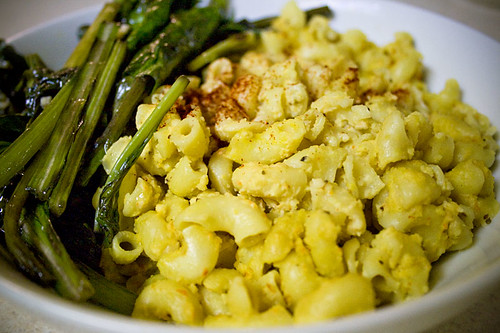
Macaroni in a cashew / almond "cheese" sauce with a side of sauteed beet greens.

I've been making a lot of cashew-based sauces lately and I think this is my favourite so far. It's a more delicate taste than your traditional heavy nutritional yeast sauces (I still like those). The reason why it doesn't look creamy is because this is a photo of the macaroni the next day after all the sauce has soaked in. The day of, it was beautifully creamy.

Anyway, here's the recipe I concocted. I'm not reinventing the wheel as there are so many cashew sauces out there and they are all pretty simple.

Notes: If you want a smooth sauce, pre-soak the nuts for a few hours, then drain.

For step two, if you have a large blender, then throw everything in. If you have a food processor though, ad the water gradually as I mentioned.

You can use just cashews if you want and you could probably cut the amount of nuts down too to a total of 1 or 1.5 cups since raw nuts aren't cheap.

Macaroni in a Cashew / Almond "Cheese" Sauce

1 lb macaroni, uncooked
yellow mustard (to coat cooked macaroni)

1 cup raw cashews
1 cup raw almonds
1/2 cup nutritional yeast
salt, pepper, onion powder, garlic powder and celery seed (to taste)
1 small red pepper, cooked until soft (optional)
1/4 cup olive oil (optional)
2-4 tbsps lemon juice (to taste)
4 cups water
  1. Cook your pasta until al dente. Drain and toss with enough yellow mustard to lightly coat each piece and then set aside.

  2. Put all the dry ingredients into your blender or food processor and process until it is a fine powder. For the seasonings, start with 1 tsp of everything except salt. For the salt, start with 1/2 tsp or go with 1 tsp if you like salt. 1/2 tsp probably isn't near enough but it's better to start undersalted and then adjust accordingly. You can adjust the seasonings later when it is simmering in the pot. When everything is processed, add in the optional red pepper, lemon juice and oil and process until the mixture is uniform.

  3. With the motor running, slowly pour in the water, a little at a time and process until nice and smooth. Stop if your blender or food processor is getting too full (you can always add the rest of the water in the pot). Taste and adjust seasonings.

  4. Put the entire sauce mixture in a large saucepan and heat on medium-high while whisking constantly. Taste and adjust seasonings as necessary. Let the sauce cook until mixture is thickened

  5. Mix the macaroni into the sauce and serve as is OR put into a greased casserole dish, top with breadcrumbs and bake at 350F until bubbly (15 to 30 mins depending on how you like your baked mac & cheese).
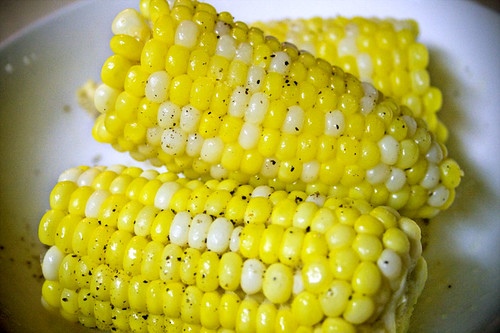
Hope you like it! Here's a bonus pic of sweet summer corn from our CSA.

Sweet Summer Corn

Monday, August 17, 2009

Pasta Pilaf


Is "Pasta Pilaf" even a correct term? Eh, I don't know and I don't care. :p

Anyway, I had a bunch of bits and pieces of produce that I needed to use up. I had originally planned on throwing them into an Aglio e Olio (olive oil, garlic, red pepper flakes) spaghetti dish but I kind of wanted something a little different.

I had a box of baby shells that I was going to use for something else but it was perfect for a pilaf-type dish because of its small size. I love making pilaf with rice, couscous or orzo (and sometimes wheat noodles for a "saucy" noodle side dish) and thought that the baby shells would work well in this too.

I sauteed some onion, garlic, zucchini (which you can't really see), carrots and peas in olive oil. Then I added vegetable broth, herbs/spices, splash of Bragg's, chickpeas and threw in the shells until done with almost all the liquid absorbed. I topped it off with the last of our CSA tomatoes and parsley. Surprisingly, I eyeballed the broth and it was the perfect amount for the pasta. You want a little liquid left so that the pasta isn't totally dry. I'm not sure what the proper ratio is but maybe 1:2 pasta to liquid ratio? Something to look up online.

Anyway, it was super fast and easy to put together (about 20 minutes) and only one pot to wash. Really simple but really tasty. Give it a try!

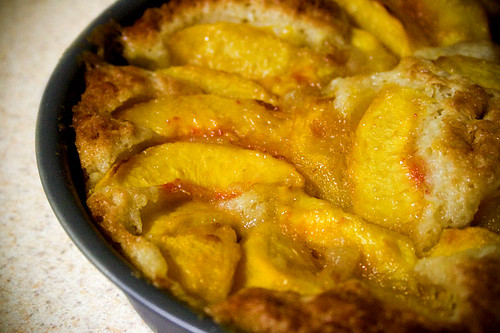
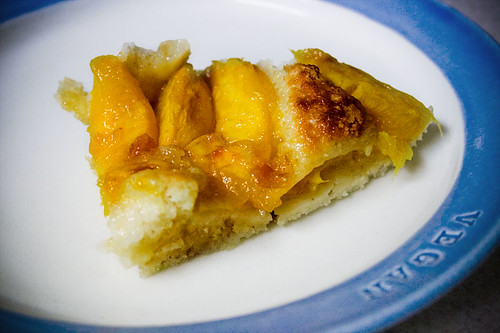
Peach Cobbler


Peach Cobbler

Peaches are my favourite fruit. When I was a kid, my dad would get baskets of Ontario peaches from farmers' stands along the highway and I would eat as many as I could in one sitting. I love love love peaches!

Thankfully, we've been receiving quite a lot of peaches from our CSA and lucky for me, the boy (also known as the Mr. sometimes) doesn't care for peaches. More for me! My favourite way to eat peaches is just sliced when perfectly ripe, but I had about four that needed to be eaten today or cooked in something. While I love peach pie, I am absolutely terrible with pastry dough and I really didn't feel like going to the store to buy a pre-made crust. Also, I really don't ever bake anything aside from bread and never make desserts so I was kind of out of ideas aside from pie or jam. I ended up scouring Recipezaar for peach ideas and decided on peach cobbler.

I don't think I've even had peach cobbler or cobbler anything, but it sounded good and easy to make so I modified this recipe. Basically I doubled the peaches, cut the sugar and margarine and used more coconut milk in the dough/batter. Here's the slightly modified version:

Fresh Peach Cobbler


4 large fresh peaches, peeled and sliced
1 cup sugar (1/2 cup for the peaches and 1/2 cup for the batter)
1/4 cup vegan margarine, melted
1 cup flour
2 teaspoons baking powder
1/4 teaspoon salt
1/4 teaspoon nutmeg
1 cup coconut milk (you could use 3/4 soy milk)
  1. Mix peach slices with half the sugar (1/2 cup) and set aside.
  2. Pour the melted margarine into an 8" square or round baking dish.
  3. Mix the dry ingredients: flour, baking powder, salt, nutmeg and remaining sugar (1/2 cup).
  4. Stir in the coconut milk until just combined. The consistency should be like a thick muffin batter. Well I don't know if it should be, but that's how mine was. Add more coconut milk if needed.
  5. Put the batter over the melted margarine, smoothing out as necessary to cover the bottom of the pan.
  6. Top with the peaches including any liquid that has been extracted.
  7. Bake at 375F for 45 minutes.
I thought it turned out really well. The only reason why I used coconut milk was because I was out of soy milk. I think it added a nice richness to it and you really couldn't taste the coconut.

I had it both warm and cold and both ways were delicious! The top and sides were nice and crunchy and the middle under the peaches was cakey with some gooey parts due to the peach juice and margarine. It was so easy to put together with ingredients that I always have on hand and it totally tastes like summer.

ETA: You're going to see this blue plate a lot, not just because we're vegan, but because it literally is the only nice plate I own. The rest are cheapo white dishes from Target. :)

Friday, August 14, 2009

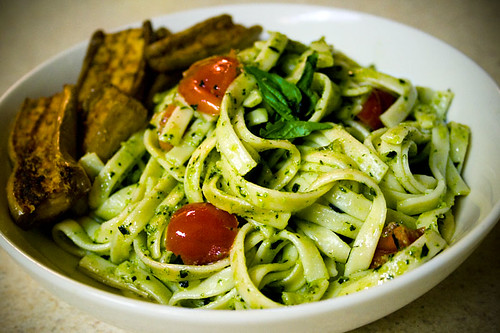
Pesto Fettucine & Roasted Eggplant


More CSA produce to use up! We are almost caught up with our shares. All that's left right now are some beets, sweet candy onions, jalapenos and zucchini.

The pesto was made with basil, olive oil, garlic, salt, pepper, blanched almonds and nutritional yeast and then tossed with fettucine and fresh diced heirloom tomatoes.

On the side is eggplant tossed with olive oil, salt, pepper, garlic and oven roasted until soft and nicely browned on top.

A simple but delicious dinner and so much healthier than that damn tomato pie from yesterday!

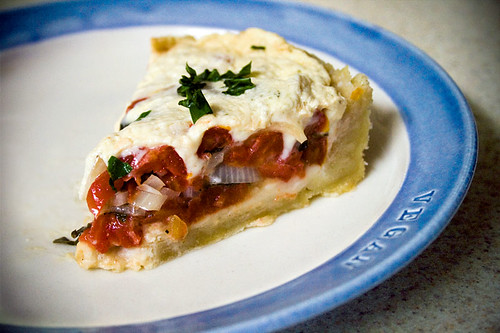
Southern Tomato Pie


I love belonging to a CSA but sometimes we get so much of something that I need to branch out and try something new. This week we got a ton of tomatoes. I usually just drizzle with olive oil, salt and pepper, but I wanted to do something different and came across a ton of recipes for Southern Tomato Pie, not to be confused with local Tomato Pie.

I was intrigued by the simplicity of Southern Tomato Pie as well as the sheer fattiness of the dish. Basically it is fresh tomatoes, onions and basil in a full fat pastry crust and topped with a combo of cheese and mayo.

For my version, I used the classic Crisco crust recipe with vegetable shortening. I suck at making pastry so mine looks pretty thick. I prebaked the crust for 10 mins and then filled with layers of pre-salted and drained sliced tomatoes, sliced sweet onions, basil and black pepper. Then it was topped off with a combination of Daiya vegan mozzarella, Vegenaise and some chives for good measure. Then it was baked for about 35 minutes.

The verdict? Delicious but super heavy. Despite the fresh produce, the pastry and cheese and mayo will tip you over the edge into food coma really quickly.

I think this is the single most calorie dense and unhealthy dish I've made pre- and post-vegan! I think if I ever make this again, I'll make it more like a European savoury pie by skipping the topping. It was fun to make though and I think it was successfully veganised!

Wednesday, August 5, 2009

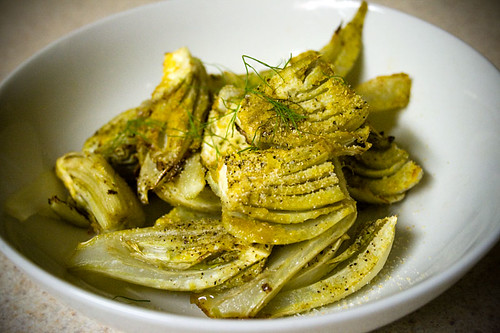
Roasted Fennel


I hate the taste of licorice with a passion and I can only tolerate something like anise if it is a minor ingredient. As a kid, I routinely tried to like those licorice candy bits but to no avail. I hated it.

This week's CSA share had two bulbs of fennel. I almost swapped them for something else but I changed my mind because I'd never cooked with fennel before and was curious how it would turn out. I've been told that the licorice flavour becomes more and more subdued as fennel cooks. Because I hate licorice so much, raw in a salad was totally out of the question. I know that some folks put it in soup, but it's so damn hot here that one pot of soup a week is the most I can handle. I really couldn't think of what else to do but oven roast it. Oven roasting is my default for vegetables I've never cooked with or if I am out of ideas. It is actually my favourite way of preparing a lot of things like broccoli, cauliflower and squash. Easy and flavourful.

I cut up the bulb into manageable pieces (sort of looks like artichoke hearts, eh?), drizzled with olive oil, sprinkled with salt, pepper & nutritional yeast and oven roasted at 450F for about maybe 25 mins (can't remember exactly how long) until it was tender, browned and caramelised. I then garnished it with a little bit of the fluffy green tops.

The verdict? It was pretty good with only a hint of licorice. Would I make it again? Maybe for guests who are fans of fennel but probably not for myself. It was fun experimenting though and I was still pleased with the results!

Monday, August 3, 2009

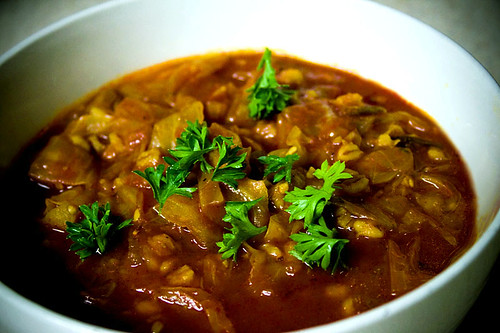
Cabbage & Barley Soup

Cabbage & Barley Soup

When life hands you cabbage, you make cabbage soup!

We've been inundated for the past month with cabbage from our CSA share. I had two more heads left after roasting some and making coleslaw so I decided to make soup tonight.

The soup contains cabbage, onion, garlic, carrots, celery and barley. The base is tomato juice and it is seasoned with a couple of vegetable bouillon cubes, black pepper, vegan worcestershire sauce, sugar, thyme and summer savoury.

I sauteed the aromatics (onion, garlic, celery, carrots) first and then added in the rest of the ingredients. 25 mins in my pressure cooker and it was cooked to perfection and tastes like it was simmering for hours. Yum!

One more head of cabbage to go!

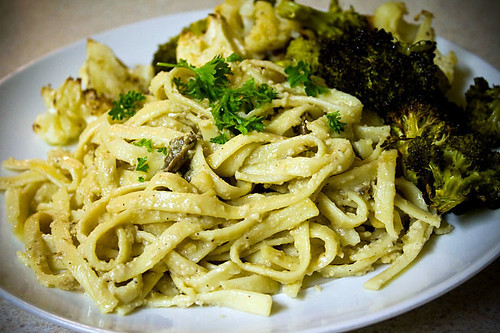
Vegan Alfredo & Vegetables


Vegan fettucine alfredo made with a cashew-based porcini & roasted garlic cream sauce and a side of oven roasted broccoli & cauliflower.

The sauce was simply blended cashews with water, salt, pepper, nutritional yeast, garlic & onion powder and about 6 cloves of roasted garlic. I sauteed (rehydrated) porcini mushrooms in margarine and then added the cashew mixture and let that simmer until thickened. If you soak the cashews first in boiling water and blend for a long time and use soy milk instead of water, it will yield a much creamier sauce. I don't mind mine not entirely smooth though.

The broccoli and cauilfower were done how I always do roasted vegetables — tossed with olive oil, salt, pepper, herbs/spices and then roasted at 450F until nice and browned.

Friday, July 31, 2009

Hello, my name is ____ and I'm a carboholic


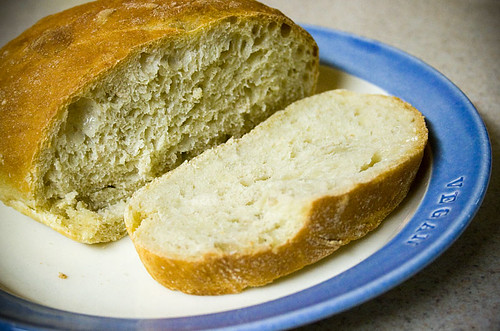
I love bread. Always have and always will. There's absolutely nothing better than a fresh loaf of bread.

Above is one of two loaves I baked today. Sure, the crumb isn't all full of large irregular holes, but it does have the perfect "custard" crumb (see the shiny large hole to the left) and it's not as crusty as I would have liked (I was sort of rushing during shaping and baking) but it was delicious.

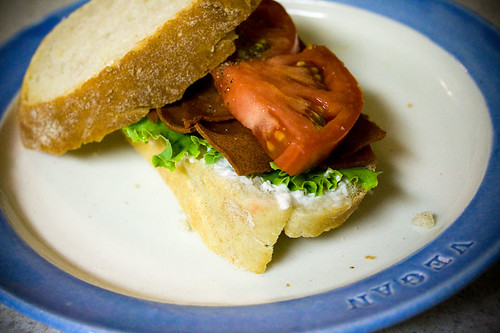
Since I had two loaves (shaped as boules), beautiful tomatoes & lettuce from my CSA and a package of Smart Bacon that I had forgotten about in the back of the fridge, tonight's dinner was vegan BLTs! The other loaf I'm saving for tomorrow to eat with fresh tomatoes, roasted garlic, olive oil and a splash of balsamic. Simple and delicious.

Vegan BLTs

Basic artisan breads are almost always vegan since they are only supposed to contain flour, yeast, water and salt. Totally vegan soft sandwich breads are a little harder to find since they have all sorts of hidden ingredients that aren't vegan friendly or ingredients that are hard to tell whether it's from plant sources (e.g., mono and diglycerides). Even though they are harder to find, you can still find them but usually they aren't that cheap. Artisan breads? We're talking anywhere between $2 to $5 a loaf. Forget that!

Anyway, I stopped buying both types of bread ages ago because I couldn't justify spending the money on something I could make for a fraction of the cost. I have a lovely bread machine that I use to make soft sandwich bread weekly (a half whole wheat "buttermilk" loaf). It was a gift from my sister several years ago and I still use it to this day. As for the artisan loaves, I make them by hand. I've been experimenting with a few different recipes and techniques with delicious results. I started with the No Knead one but have graduated from that and now make bread using a combination of recipes and techniques from two great books: Artisan Breads in Five Minutes a Day and The Bread Baker's Apprentice.

If you bake bread or want to try, get both books. If you are a cookbook whore (looking at you Lisa!) or only like reading about bread, then get The Bread Baker's Apprentice. Bread making is a lot of fun and for most artisan breads, you really just need flour, water, salt and yeast. Forgot spending so much money on artisan loaves and give it a try. :)

Oh, the beautiful vegan plate was purchased from Jeanette Zeis of Vegan Dish. Beautiful beautiful stuff!

P.S. Bonus pic: Mr. Marbles.

Mr. Marbles

Saturday, July 18, 2009

Family Bonus Pics

Ms. Shou Bidou and Shadow.


Shadow

Wednesday, July 15, 2009

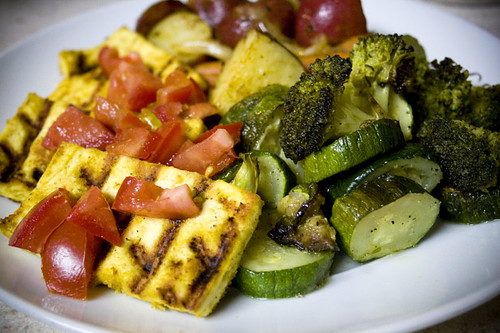
Grilled Tofu & Vegetables


Grilled tofu with roasted broccoli & zucchini and a side of roasted red new potatoes.

The tofu was marinated in olive oil, garlic, lemon juice, braggs and Bryanna's broth powder and then grilled on my fancy George Foreman grill. I love that grill!

Sunday, July 5, 2009

Is this thing still on?

I can't believe it's been six months since I posted something. Time sure flies and apologies to anyone who posted comments but never got a reply from me. We've been super busy with life the past six months and recently relocated to the city of brotherly love.

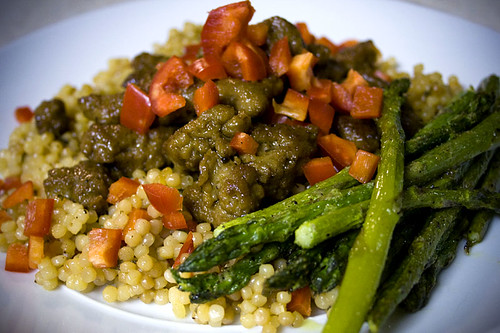
On to the food. I spent yesterday trying to perfect seitan so that the texture is super soft and a little flakey and layered (if that made sense). Basically I am trying to mimic the seitan that is custom made for Horizons. I have had seitan very close to that before and it was the raw seitan sold in bulk at Essence of Life in Toronto (in Kensington Market). Super soft & tender texture when cooked but not spongey at all. I make seitan all the time with different textures for sandwiches, cutlets, etc., but nothing even close to that texture.

Attempt #1. Whole wheat flour & bread flour kneaded, rested and rinsed (and rinsed, and rinsed) and then, flattened and stretched with a bit of oil into irregular pieces and then slow baked in a broth made from water, soy sauce, bragg's and minced garlic. Texture was better than using vital wheat gluten but not even close to how I wanted it.


Oh well, I had to cook it up anyway so I marinated it in olive oil, salt, pepper, spanish paprika, onion & garlic powder, chili powder, cayenne, soy sauce, braggs and sugar for an hour or so. Then it was panfried and glazed with the reduced marinade and served on top of Israeli couscous pilaf with a side of asparagus. Even though it wasn't the texture I wanted, dinner was still delicous!

Stay tuned for more adventures in seitan making. In the meantime, here's a bonus Shadow pic from March.

Shadow

Thursday, January 1, 2009

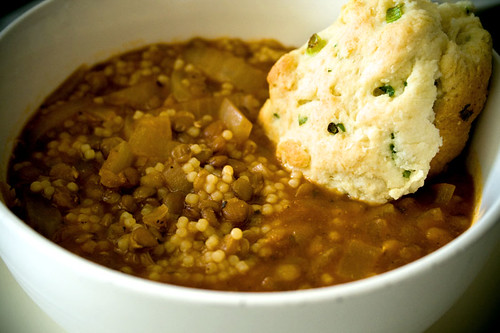
Lentil Soup & Biscuits


Happy new year!

I know I've been slacking but I'll try and actually cook some different things going forward. A lot of times I cook the same things from week to week which doesn't make for interesting food blogging.

Anyway, we're short on food in the house but I managed to scrape together enough for homemade soup and biscuits.

The soup is a tomato-based lentil soup with onions and tiny pasta. The biscuits are just really your standard biscuits with scallions thrown in and a slight twist. Instead of oil or shortening, I used Vegenaise which added the fat you need but also additional flavour and tenderness. Try it!

Here's to a new year which I hope will bring great things for everyone. :)
Blog Widget by LinkWithin